
Welcome to the world of chaffles, where the humble waffle maker transforms simple ingredients into something utterly delicious! If you’re searching for a quick and satisfying meal that melds the flavors of ham and cheese, look no further than these irresistibly tasty Ham and Cheese Chaffles. Perfect for breakfast, lunch, or a snack, these chaffles are sure to please anyone with a palate for savory delights. Let’s whip up a dish that’s not only easy to prepare but also bursting with flavor, making it an essential addition to your meal rotation!
What Makes This Recipe So Good
This recipe shines for several reasons. First and foremost, it’s incredibly easy to make. With just a handful of ingredients, you can create a satisfying meal in under 15 minutes. Additionally, it’s budget-friendly; using ingredients you likely already have in your pantry, such as eggs, cheese, and ham, means you won’t break the bank. Lastly, these chaffles are perfect for those following low-carb diets, as they provide a delightful texture that replicates traditional waffles without the added carbs. It’s a win-win!
Your Guide to Making Ham and Cheese Chaffles
Crafting these chaffles is straightforward and beginner-friendly. First, you’ll preheat your waffle iron and prepare your ingredients. Combining eggs, cheese, and ham creates a thick batter that’s packed with flavor. Once everything is mixed, you’ll pour the batter into the waffle iron and let it cook until golden brown. In just a few minutes, your scrumptious chaffles will be ready to enjoy!
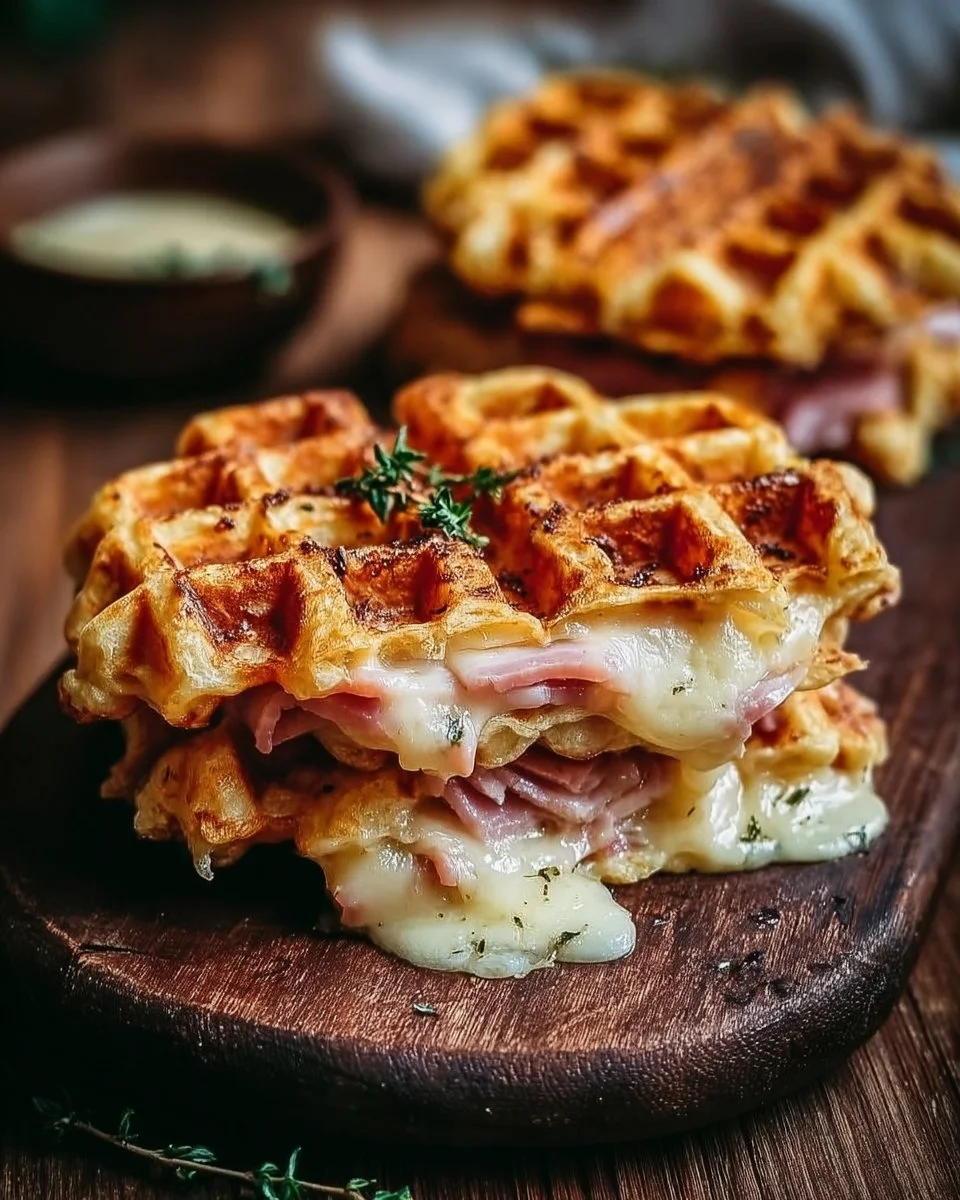
Ingredients
- Prep Time: 5 minutes
- Cook Time: 5 minutes
- Total Time: 10 minutes
- Servings: 2 chaffles
- 1 cup shredded cheese (cheddar, mozzarella, or your choice)
- 2 large eggs
- 1/2 cup diced ham
- 1/4 teaspoon garlic powder
- Salt and pepper to taste
- Cooking spray or oil for the waffle iron

The key ingredients in this recipe are not only simple but also versatile. You can use any type of shredded cheese to suit your taste, making it easy to mix things up. The diced ham adds a savory touch, while the garlic powder enhances the overall flavor, bringing everything together seamlessly.
Step-by-Step Instructions
Now that we have everything ready, let’s dive into making these delightful chaffles!
- Preheat your waffle iron: Set it to medium-high heat and spray it with cooking spray to prevent sticking.
- Mix the wet ingredients: In a mixing bowl, whisk together the eggs, garlic powder, salt, and pepper.
- Add the cheese and ham: Stir in the shredded cheese and diced ham until the mixture is well combined. This is where the magic starts to happen!
- Cook the chaffles: Pour the mixture onto the preheated waffle iron. Close the lid and allow it to cook for about 3-5 minutes, or until it turns golden brown and crispy.
- Serve and enjoy: Carefully remove the chaffles from the waffle iron. Enjoy them plain or pair with your favorite dipping sauce!
Tip: Keep an eye on the cooking time, as waffle irons can vary. It’s better to check a minute earlier to avoid overcooking.
Creative Ways to Serve Your Chaffles
One of the best things about these chaffles is their versatility. You can serve them in various ways to suit different occasions. Here are some delicious serving ideas:
- Enjoy them plain for a simple snack.
- Dip them in your favorite mustard or ranch dressing for an added flavor boost.
- Pair with a side salad for a light lunch.
- Serve with scrambled eggs for a hearty breakfast.
- Top with avocado slices for a creamy touch.
Whether it’s a weekend brunch or a quick weeknight dinner, these chaffles fit perfectly into any meal plan.
How to Store and Reheat Leftovers
Got leftovers? Simply store your chaffles in an airtight container in the fridge. They will keep well for 2-3 days. To reheat, pop them back into the waffle iron for a few minutes, or use a toaster oven to bring back their crispiness. **Avoid using a microwave**; it tends to make them soggy instead of crispy!
Expert Tips for Perfect Chaffles
When making chaffles, a few handy tips can elevate your cooking game:
- Don’t overfill: It’s tempting to pour more batter, but overfilling can lead to messy chaffles and an overcooked outer layer. Stick to the recommended amount.
- Experiment with flavors: Feel free to adjust the seasonings and cheese varieties to suit your palate. Add spices like paprika or herbs for unique flavors!
- Try different meats: While ham works beautifully, you can also use cooked bacon, sausage, or even shredded chicken.
Just remember, practice makes perfect. Each time you make them, you’ll learn how to get them just right!
Delicious Variations to Try
Want to switch things up a bit? Here are some creative variations to consider:
- Vegetarian Chaffles: Omit the ham and add sautéed spinach, bell peppers, or mushrooms for a veggie-packed option.
- Spicy Jalapeño Chaffles: Incorporate diced jalapeños for a spicy kick that adds great flavor.
- Italian Chaffles: Swap the cheddar for mozzarella and add Italian herbs for a pizza-inspired version.
These variations keep your meals exciting while still being quick and easy to make!
Frequently Asked Questions
- Can I make these chaffles ahead of time? Yes! You can prepare the batter ahead and store it in the fridge for up to a day. Just give it a good stir before pouring into the waffle iron.
- What if I don’t have a waffle iron? You can also cook the mixture in a regular skillet, using it like a pancake. Just flatten the mixture and cook for a few minutes on each side.
- Are chaffles gluten-free? Absolutely! With no traditional flour used, these chaffles are gluten-free and fit perfectly into low-carb diets.
- Can I freeze chaffles? Yes, you can freeze them. Place cooled chaffles in a single layer on a baking sheet, freeze until solid, then transfer to an airtight container. They can be reheated directly from frozen.
- How do I make them crispy? Ensure your waffle iron is adequately preheated and try leaving them in a little longer if they are not crispy enough.
Now that you’re well-informed, grab your ingredients and get ready to enjoy some delightful Ham and Cheese Chaffles! With their comforting flavors and satisfying texture, they’re destined to become a new family favorite. Happy cooking!